Notes
- Administrator privileges are required in order to use this function.
- Import time may vary based on the number of departments to be changed. Administrators will be notified by email when the process is complete.
Procedure
1. Click on the user name, then "Admin settings", then "Manage departments".

2. Click on the "Import from File" button.
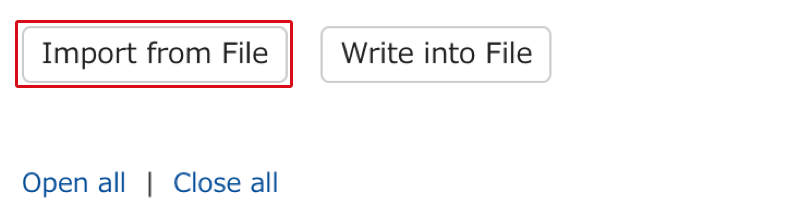
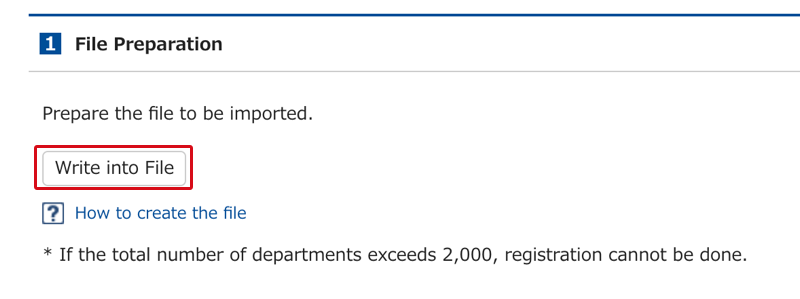
3. Click on the "Write into File" button.
The current department list will be downloaded as a CSV file.
Be sure you are using the latest department list. Also note that is not possible to only write either new or edited departments.
4. Edit the downloaded CSV file.
See here for details on individual items in the file.
*Do not enter anything in the Department ID column. The system will automatically process this information.
Example)
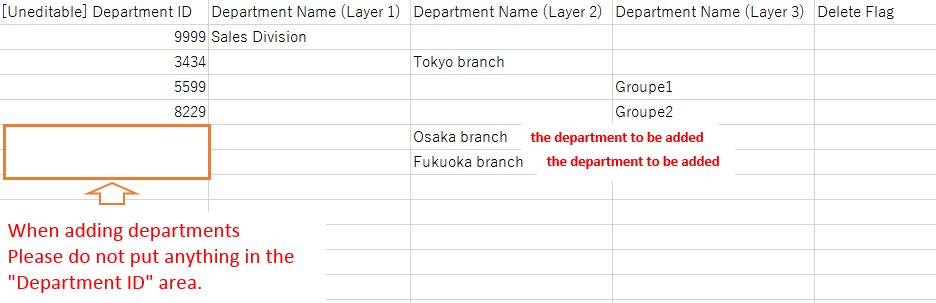
*Deleting a line in the CSV file will not delete the department. Edit the file in accordance with the entry rules.
See [here] for input rules.
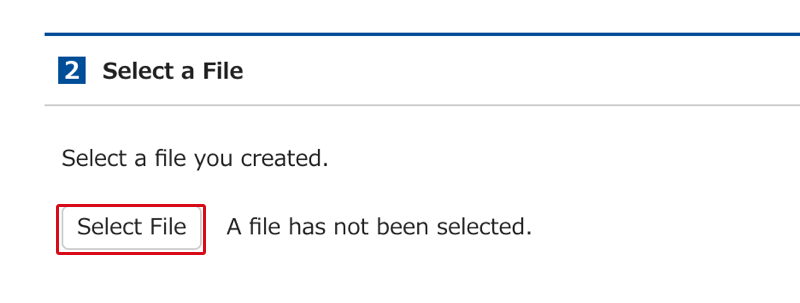
5. Click the "Select File" button and choose the file prepared in step 4.
6. Check the file contents.
The first few rows will be shown. Check for any issues with the file contents or the delimiter. If you do spot any problems, revise the file and re-upload it.

7. Click the "Start Input" button.
If you only want newly added departments to display on certain scanners, remove the check next to "Display on Sansan Scanner Set".
System administrators will be notified by email when the process is complete.
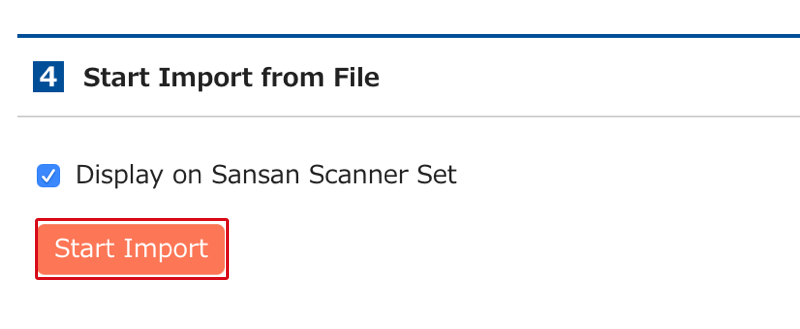
*If the check is kept next to "Display on Sansan Scanner Set", all scanners will need to be set up to reflect the changes. When the process is complete, again click "Admin Settings" then "Sansan Scanner Display Department Settings" to revise the changes.
See here for detailed instructions.