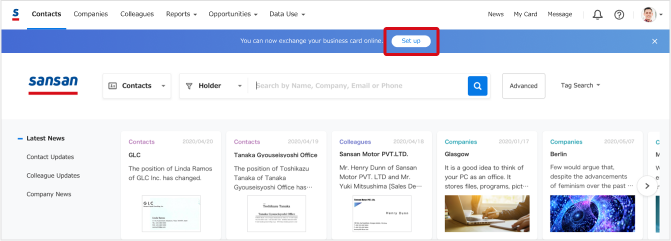
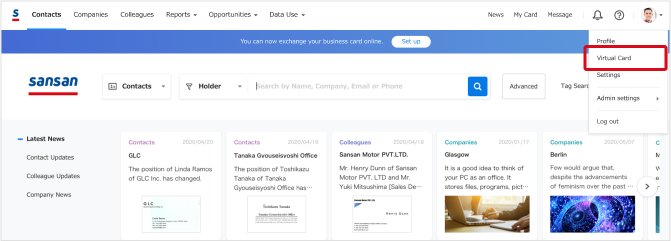
1. Access Virtual Card page
You can access the page from either of the following.
2. Select Card
To set your Virtual Card, you need to have your card in Sansan.
If you haven't scanned your own card
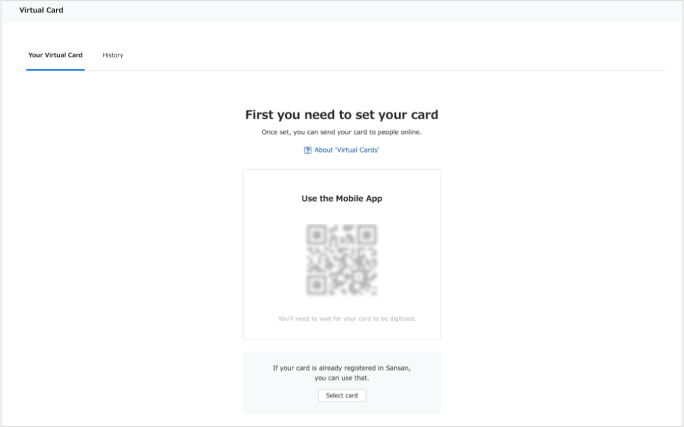
1. Scan the QR code with your mobile and follow the onscreen instructions to scan your card via the mobile app. If you don't have the mobile app or aren't logged in, the code will take you to a scanning page in your browser.
When a card with your email address is added, it is automatically registered as a Virtual Card. Bear in mind you will have to wait for your card to be digitized before you can set it as your Virtual Card.
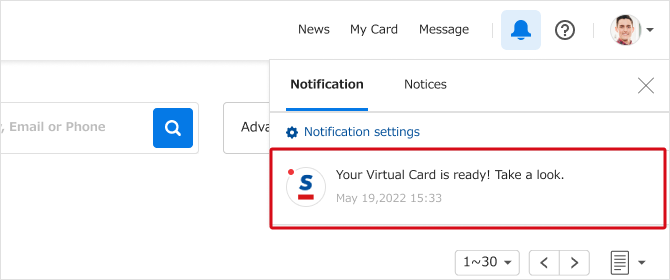
2. You'll be notified when your Virtual Card is ready to use.
If your card is in Sansan
Cards matching your user name or login email will be displayed.
Check the card info and set it as your Virtual Card.

3. Setting up your Virtual Card
Confirm that the details are correct, and set up your URL.
We also recommend setting a profile picture so that your card looks more professional to recipients.


1. Select Card
Tap "Set Virtual Card" and take a picture of your latest business card.
*Note that digitization may take some time.
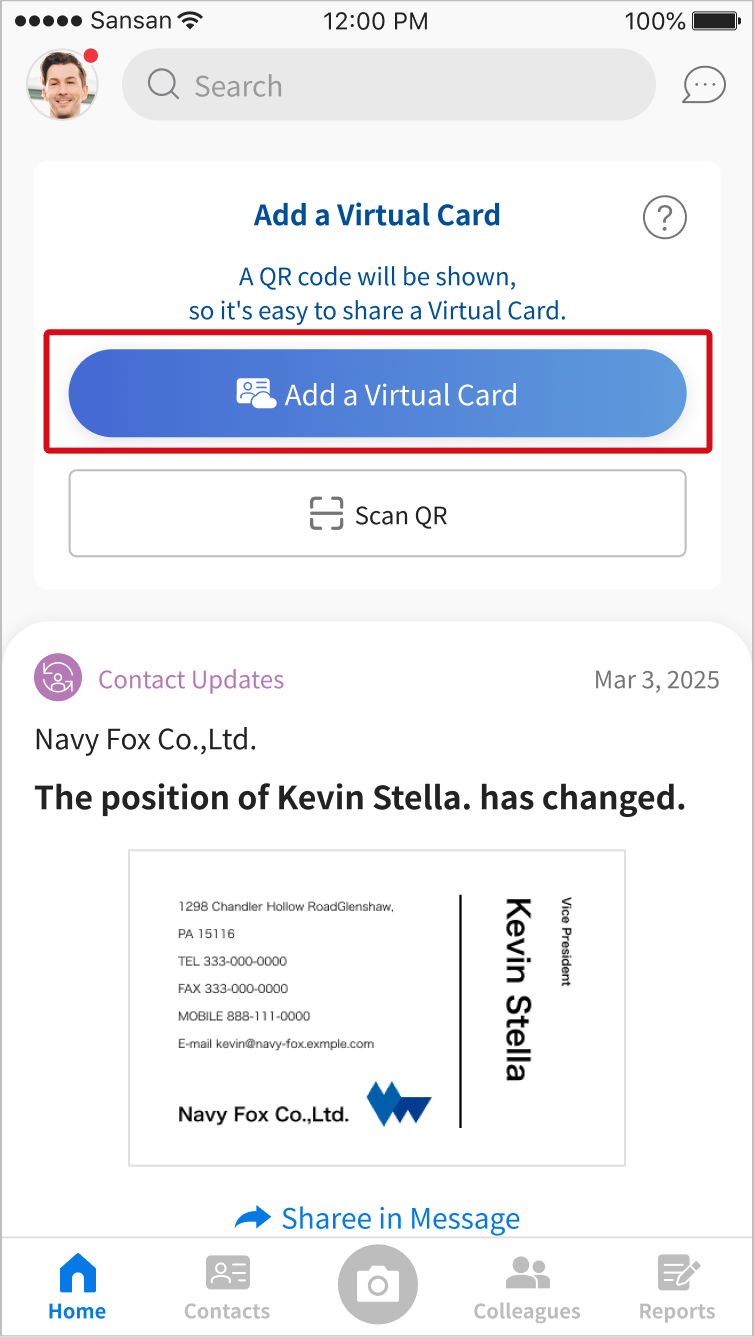

When a card with your email address is added, it is automatically registered as a Virtual Card.

If “Create” appears, tap to select a card that matches your username or email address, then tap “Set as Virtual Card”.
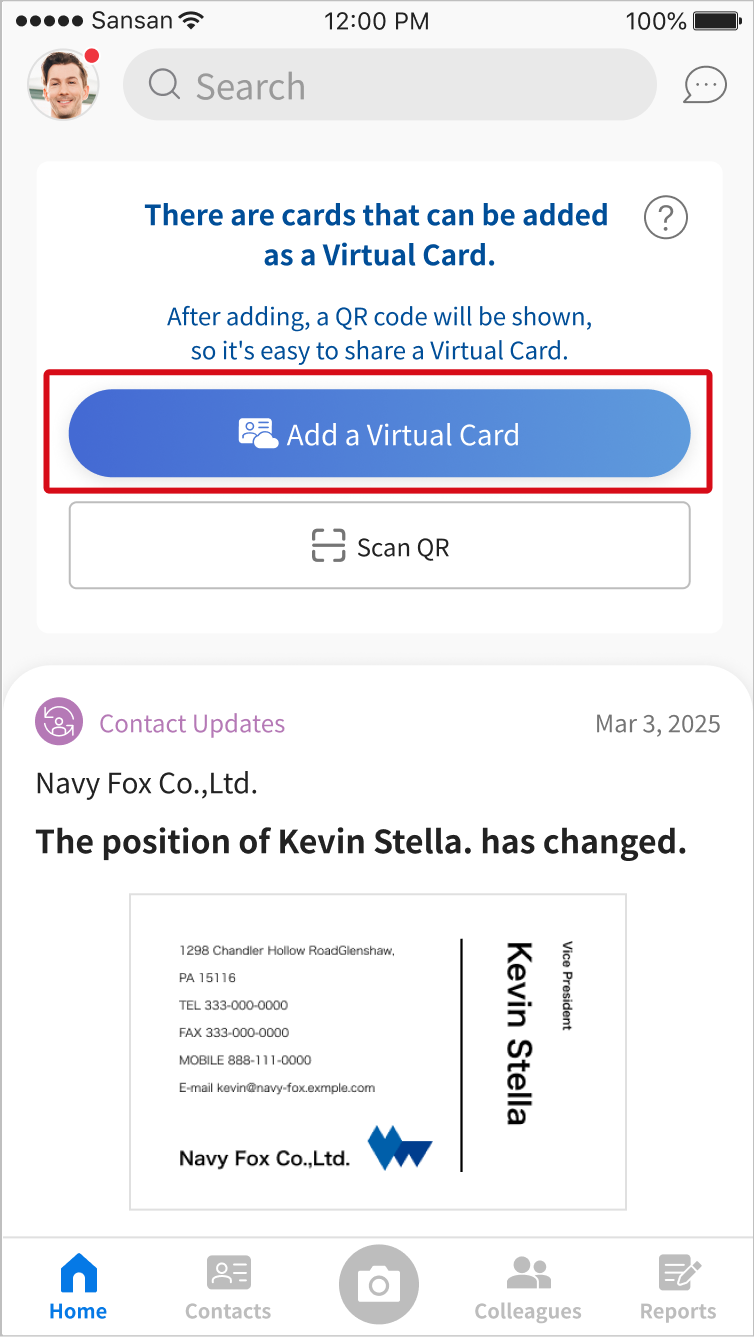
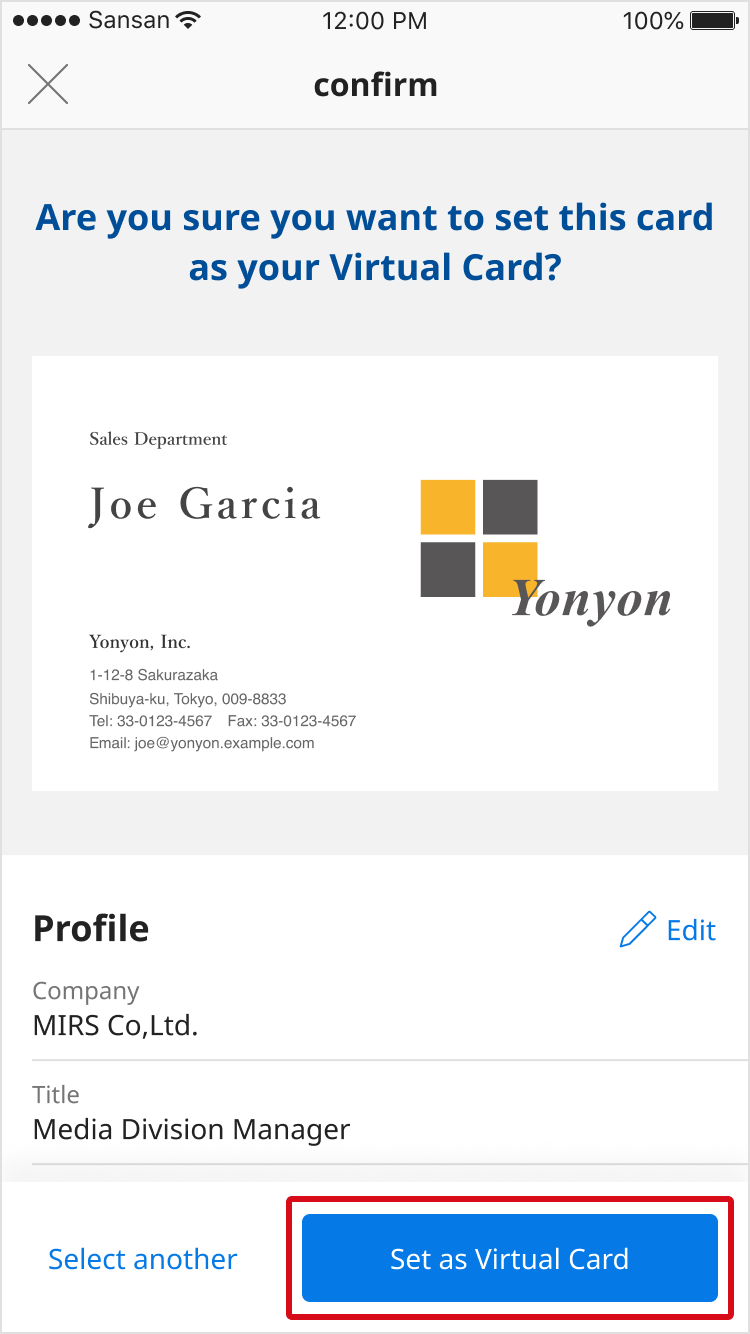
2. Setting up your Virtual Card
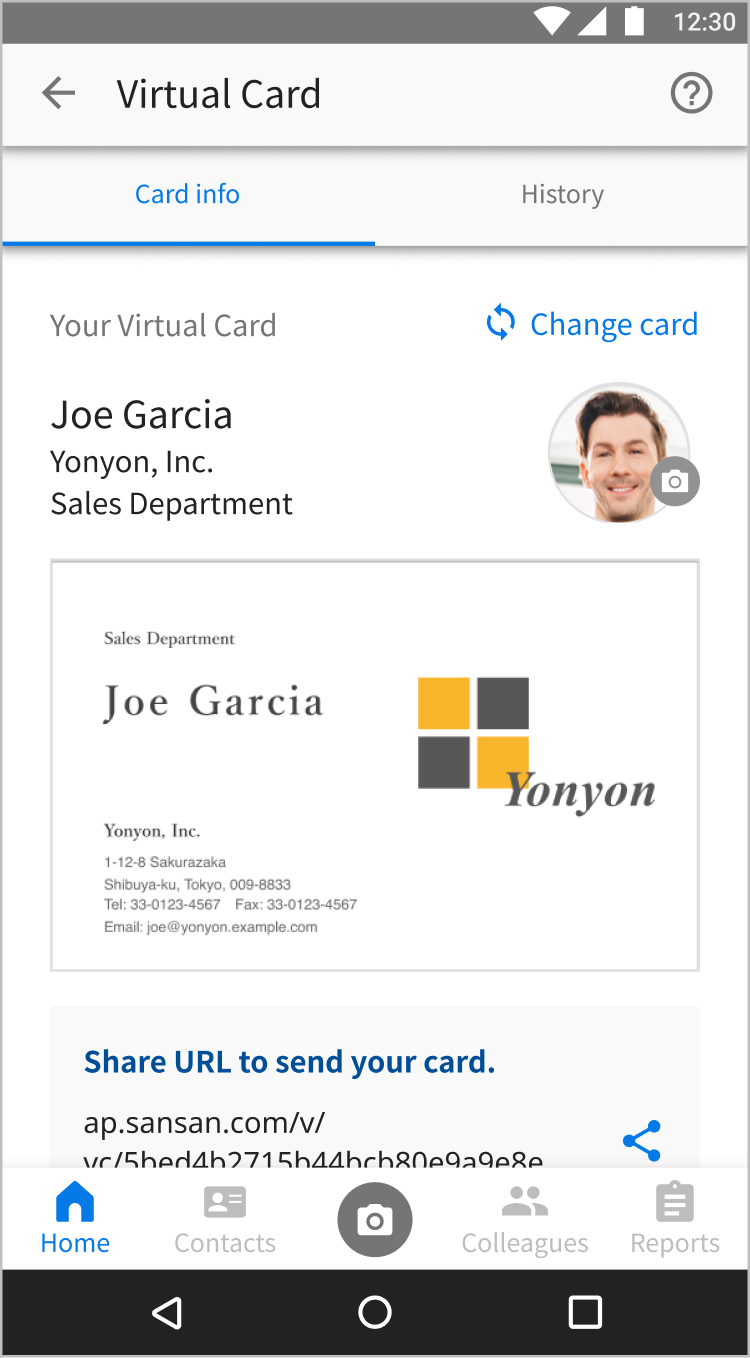
Tap the card on the Home tab to see your Virtual Card.
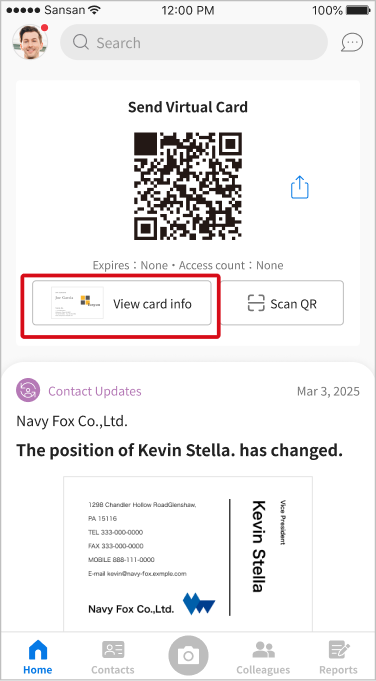
Confirm that the details are correct, and set up your URL.
We also recommend setting a profile picture so that your card looks more professional to recipients.

1. Select Card
Tap "Set Virtual Card" and take a picture of your latest business card.
*Note that digitization may take some time.
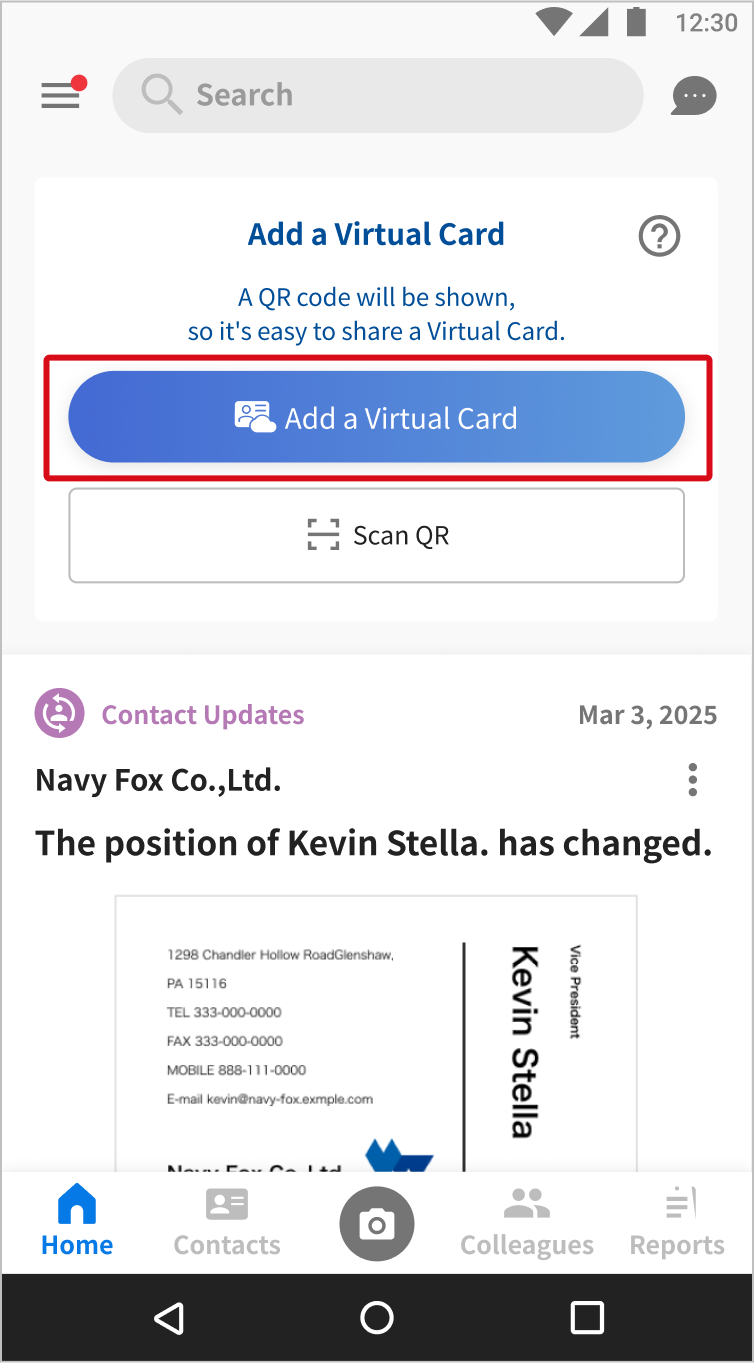

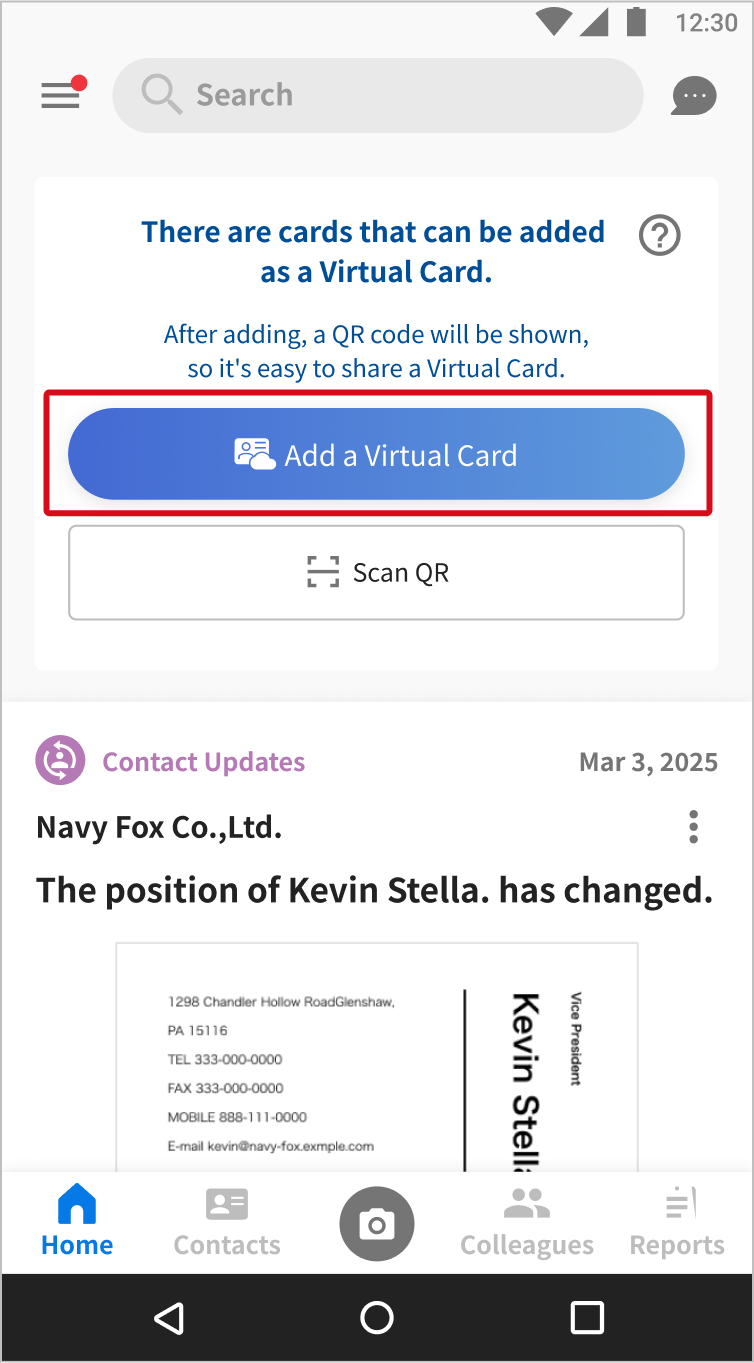
When a card with your email address is added, it is automatically registered as a Virtual Card.

If “Create” appears, tap to select a card that matches your username or email address, then tap “Set as Virtual Card”.
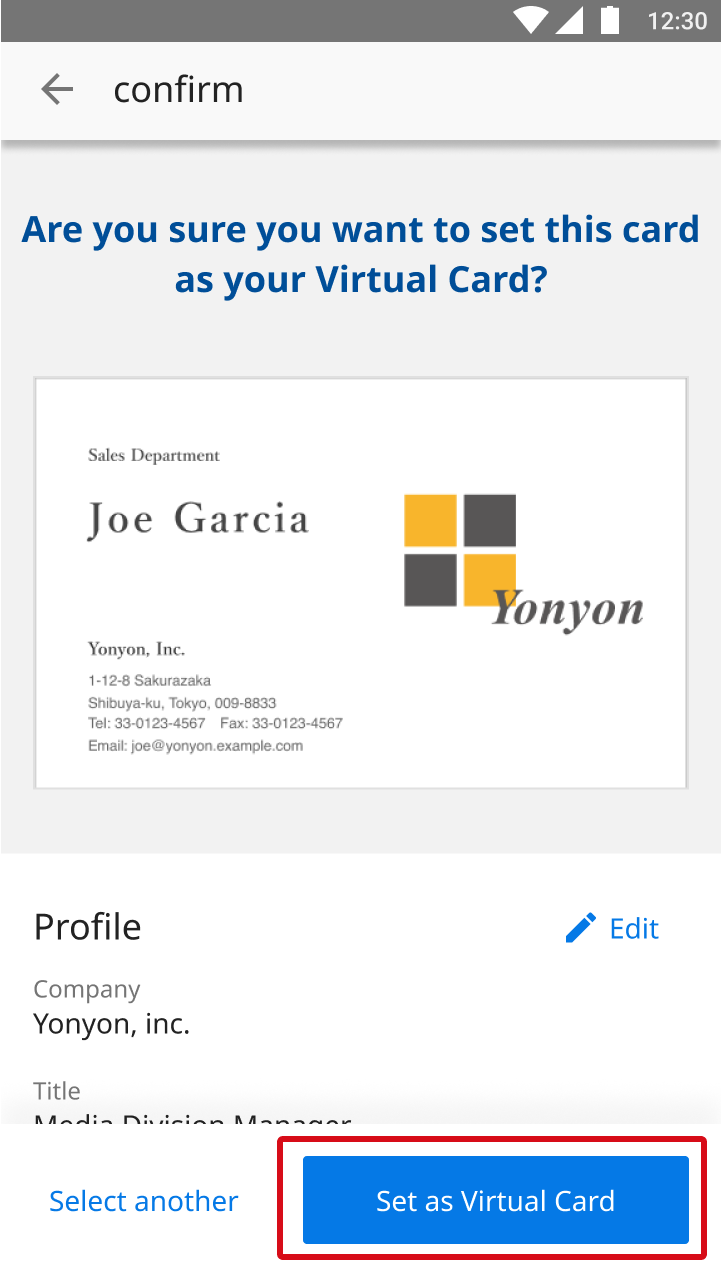
2. Setting up your Virtual Card
Tap the card on the Home tab to see your Virtual Card.
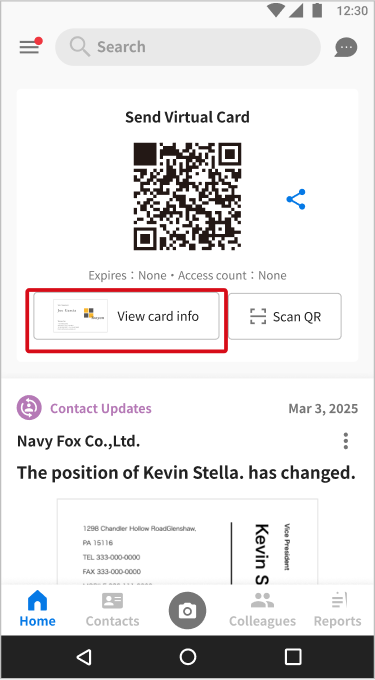
Confirm that the details are correct, and set up your URL.
We also recommend setting a profile picture so that your card looks more professional to recipients.
Related Pages
*iPhone is a trademark of Apple Inc. registered in the United States and other countries and regions. The iPhone trademark is used under license from AIPHONE CO., LTD.
*Android is a trademark of Google LLC.
*QR Code is a registered trademark of DENSO WAVE INCORPORATED.