Here we will show you how to do the set up for Dell Tablet PCs.
When the tablet PC is attached to the docking station, you cannot use the USB port on the tablet PC.
You can use the USB port on the docking station.
Device image (Hardware diagram)

1. Tablet PC
2. Electric adapter (for the docking station)
3. Electric cord (for the docking station)
4. Docking station
5. Scanner
6. USB cable for connecting to the tablet PC
7. Electric adapter (for scanner)
8. Electric cord (for scanner)
Device image (Docking station diagram)
There are two types of docking stations. After checking the back of the docking station,
connect according to the picture below.


4-1. Electric connector
4-2. USB port
4-3. LAN (wired) port (Unnecessary if you are using wireless LAN)
Procedure
1. Connect the devices to the cables.
- Connect the tablet PC to the docking station
- Connect the power cords of the docking station and the scanner
- Connect the USB cables for the tablet PC and the Scanner (the USB port for the scanner is on the back of the scanner)
- Connect a LAN cable you have to the LAN port of the docking station (Not necessary if you will use wireless LAN)
2. Turn on the scanner.
There is no power button for the scanner, but it turns on when you open the cover.
When the power is on, the blue light in the picture below will come on.

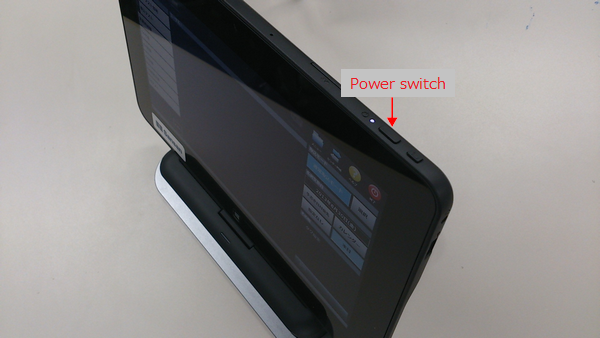
3. Lightly press the switch on the top of the tablet PC to turn it on.
If there are two buttons next to each other, do not touch the button on the right (Picture).When the PC is turned on, it is set for auto log-in.
*The Windows account name will be either "Sansan" or "Profiler". There is no password set.

4. When it is on, the screen below will come up, but please wait and do not do anything until the scanner app screen comes up.

5. When the start up is finished, the scanner app screen will come up.
If you are connecting with wired LAN or DHCP (automatic IP address acquisition), "Connected" will appear in the lower left of the scanner app. When "Connected" appears, the set up is complete.

When "No Internet connection!" appears, move ahead to doing the internet settings.

Connecting to the internet
Please see the following page for how to connect to the internet with the environment you are using.
When the devices are set up and the scanner app is open, connect to the internet and try scanning some business cards.