Here we will show you how to connect to the internet when using proxy servers. Depending on the type of proxy server, you may need to do settings in both Windows and on the Scanner App.
*When inputting addresses, it is more convenient to use a hardware keyboard. Please prepare a USB connectable keyboard you have on hand.
Procedure
Windows11
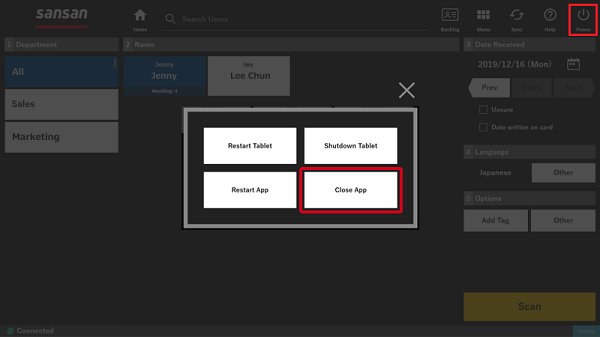
1. Close the scanner app if it's open. From the upper right of the main screen, click on the power button. The closing options will be displayed. Choose "Close App".
2. Click the Windows icon in the taskbar and click "Settings".

3. Click "Network & internet", and then "Proxy".

4. Click "Set up" for manual proxy setup.

5. Set "Use a proxy server" to "On" and configure the settings. Then click "Save".

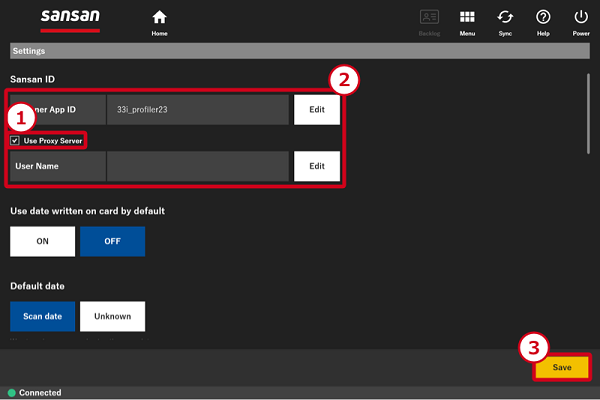
6. Start the scanner app and click "Menu" → "Settings".

7. Check "Use Proxy Server". For an authentication proxy server, enter a user name and password, then click "Save."
(*If you're not using an authentication proxy server, you do not need to enter the user name and password.)
* See these instructions for how to connect to the Internet via wireless LAN.
Windows10
1. If the Scanner App is open, please click on "Power", then on "Exit Application".
2. Click on the Internet Explorer icon, then the Gear icon, and the click on "Internet options".
3. Click on the "Connection" tab, and click on "LAN settings".
4. Do the settings for the proxy server. After you have finished inputting, click on "OK", and close the window.
Click on the Scanner App icon on the desktop to open the scanner app.
5. From "Menu", click on "Settings".
6. Put, a check in "Use proxy server". If you connect through a proxy that requires authentication, enter your proxy user name and password in the Enter Proxy Authentication dialog box. And then click on "Update".
With this the settings for the Scanner App for the proxy server are finished.
With wireless LAN
1. During setting up the devices, as the network settings are not finished, the following screen may come up.
Click on "Power" in the upper right, then on "Close App", and then do the network settings.
2. If a network security key is required for you wireless Wi-Fi, click on ICON on the task bar.
3. A list of access points you can connect to will be displayed. Choose the desired access point and then click on "Connect".
*Place a check in "Connect automatically".
4. Input the network security key and then connect.
5. Click on the Scanner App icon on the desktop to open the scanner app.
If "Connected" appears in the lower left of the screen, then the set up is complete.
If it does not appear, please contact the support center.