This option allows Salesforce opportunity information to easily be displayed on appropriate Sansan company pages. This will reduce the cost of accessing Salesforce every time you want to check specific company's opportunity information.
*This option requires you to be subscribed to the paid option of Salesforce. Please contact your company's sales representative to confirm with your Salesforce subscription.
Steps
1. Setup
- Setup guidance
Once this option is available to your company, a guidance email will be sent to your company's Sansan administrator.
Administrators can also access the Setup page from the top-right menu via "①Admin settings", and then "②Sansan Plus". Click on "③Connect" button next to Salesforce Opportunity Integration to start the Setup.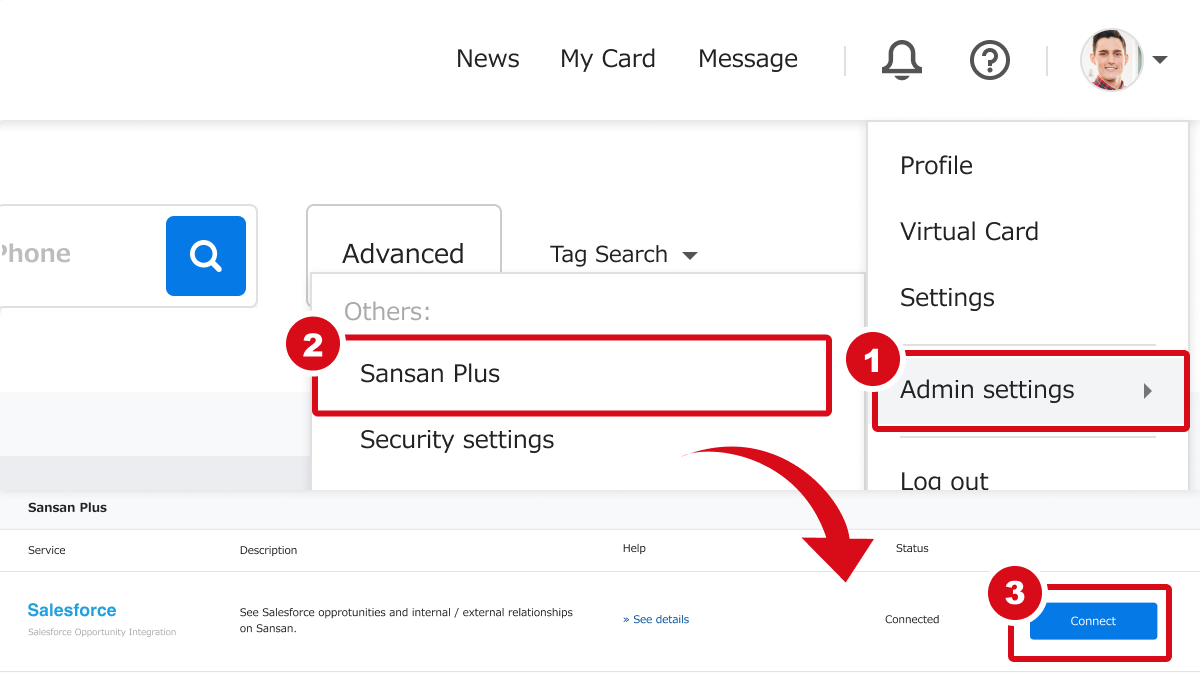
- [Step1] Select Salesforce environment to connect to
*Connecting to Sandbox environment will apply changes to all users with administrator privileges.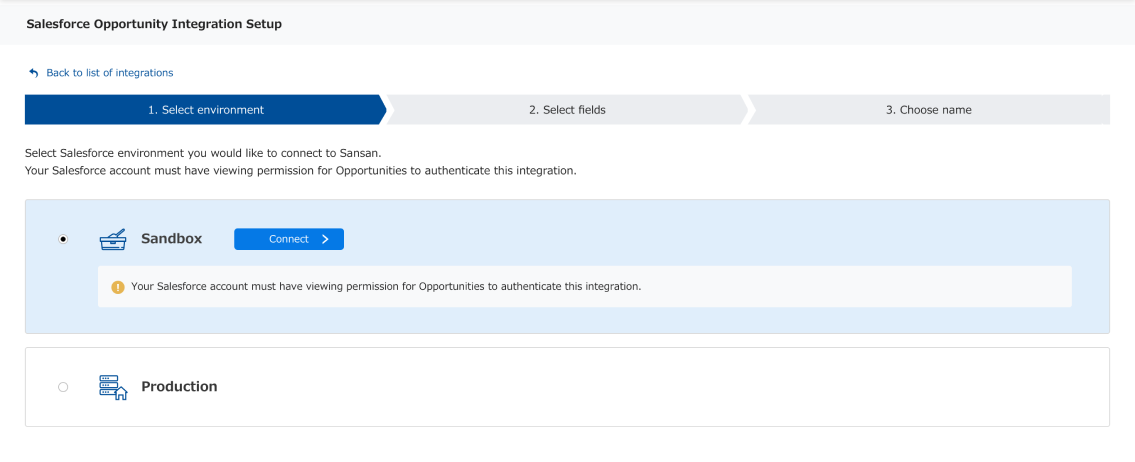
- [Step2-1] Select fields for identification
It is important you select the appropriate Salesforce fields that correspond to each Sansan field, so the company identification is successful. At the time of setup, the fields that can be selected are the standard objects provided by Salesforce
*Click here to see more about the identification.
*Click here to see more about Salesforce standard objects.
*To ensure better accuracy of company identification, make sure to select at least 1 field for each of Company, Address and TEL1. - [Step2-2] Select fields to display on company pages.
Salesforce Opportunity information, such as opportunity name, stage, last modified colleague's name, last modification date, and owner can be displayed on Sansan company page. Out of these five fields, you can select which fields you would like to display or not to.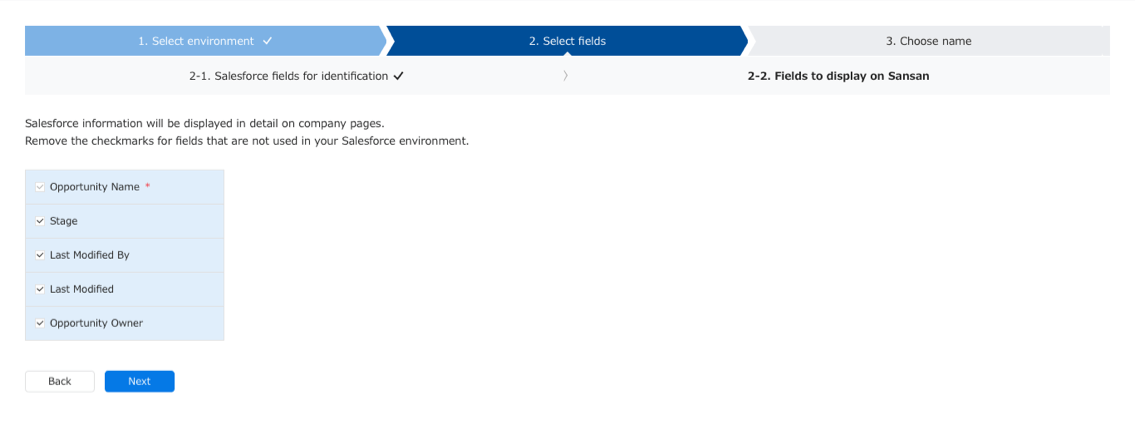
- [Step3] Change to a field name appropriate to you and your company.
Fields selected on [Step2-2], can be changed to any field name (up to 100 characters). The field names can be changed at anytime after Setup is completed.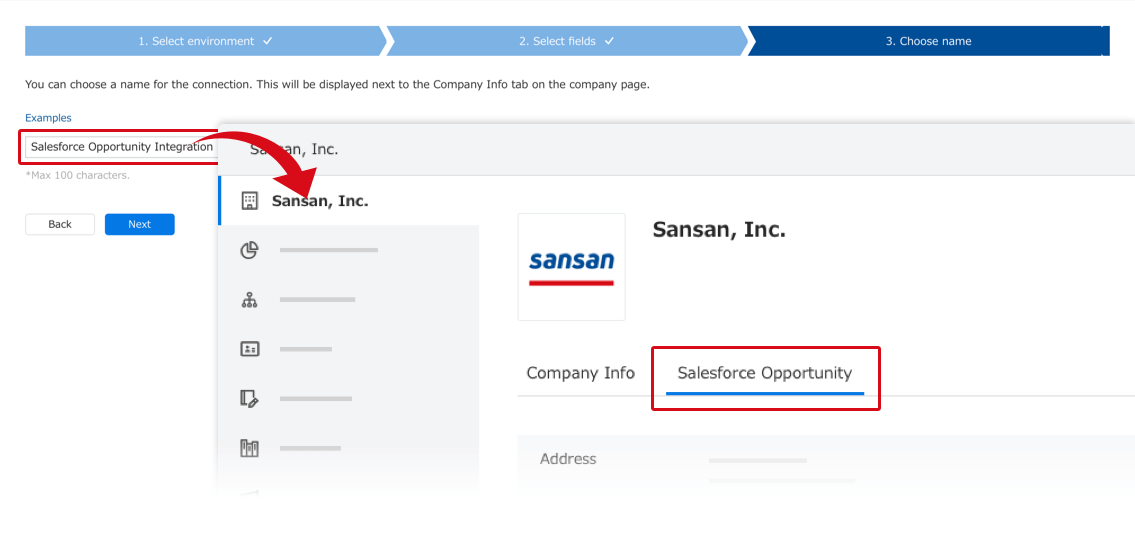
- Complete Setup
Click on "Done" button on [Step3] to complete the Setup.
Click on "①Yes, start!"
1. Select Sandbox environment → available to all users with administrator privileges.
2. Select Production environment → available to all users.
Click on "②Save settings without starting"
Settings are saved and Setup is completed.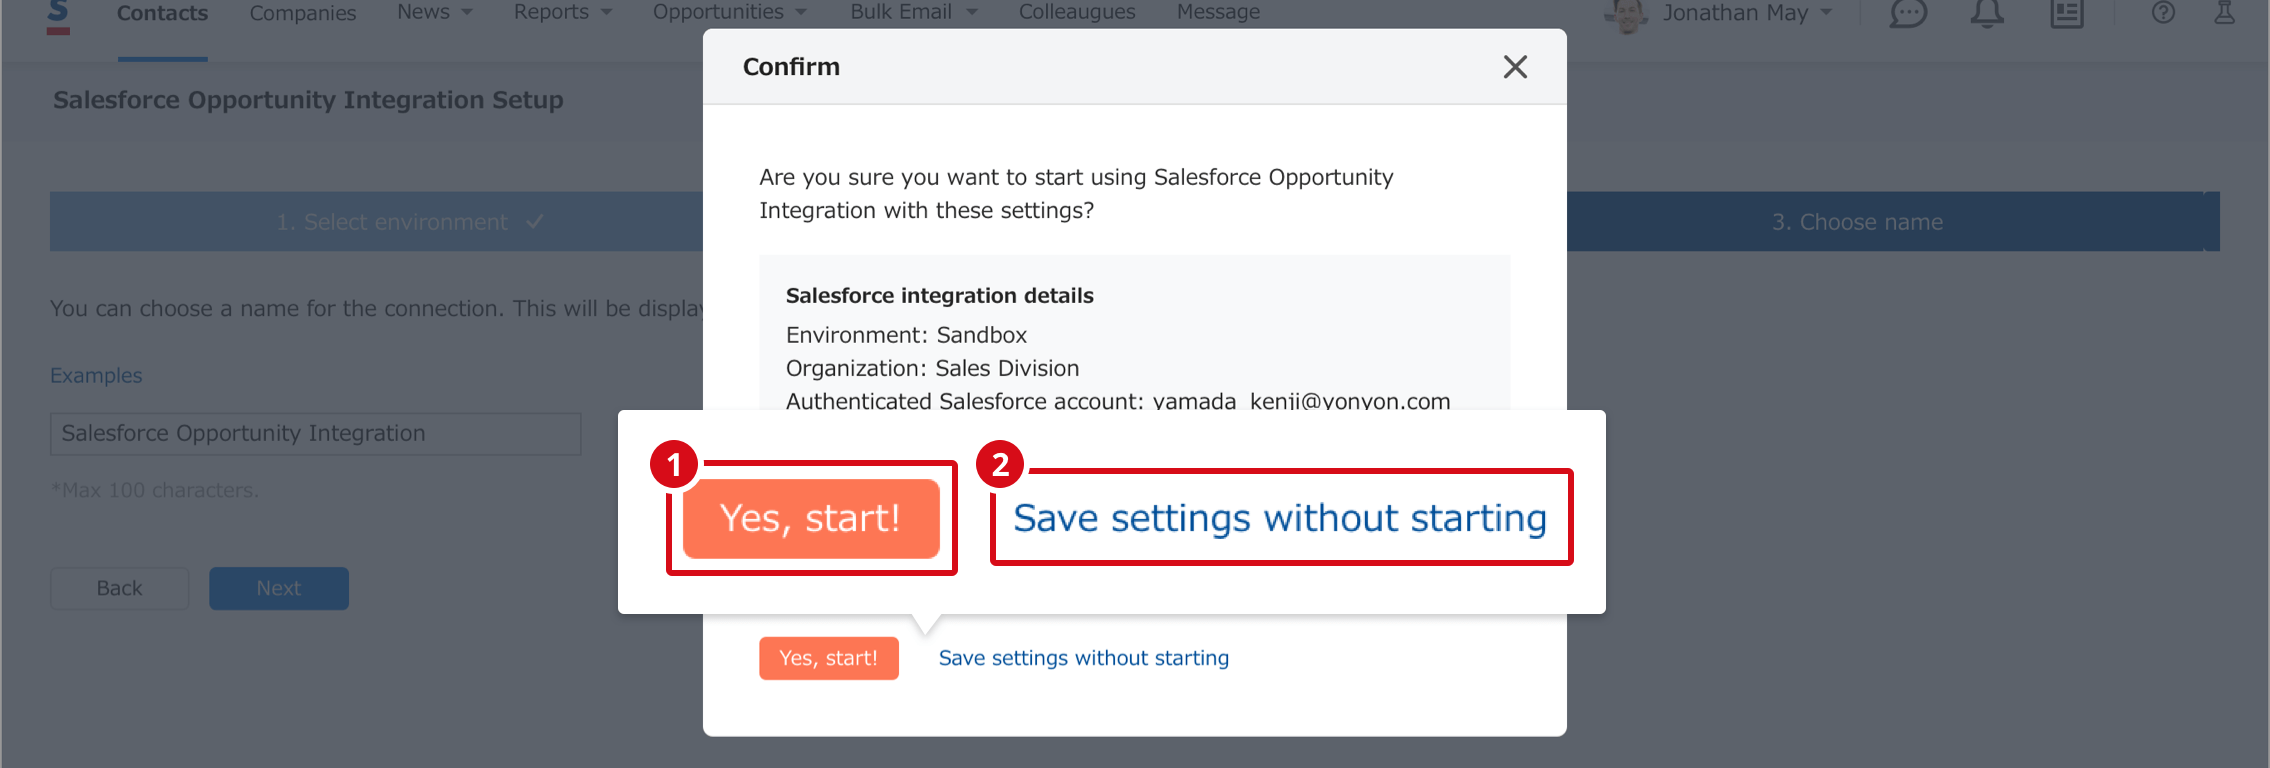
In case you saved settings without starting, you can always come back to setup screen to start the connection via Sansan Plus settings > and then clicking on "①Set up" button.
2. Edit connection settings / Disconnect
- Edit connection settings
You can change the connection settings via Sansan Plus settings > and then clicking on "①Edit settings" button. - Disconnect
You can disconnect from Salesforce environment via Sansan Plus settings > and then clicking on "②Disconnect" button.
*Disconnecting from the environment will hide all the Salesforce Opportunity information that is shown on Sansan company pages. You can display the information again via "Set up" button.
FAQ
Q. A message saying I don't have permission to view opportunities is displayed.
A. To use Salesforce Opportunity Integration, you need access permissions to the below objects and fields. This includes administrators.
- Objects you need access to
Account
Opportunity
User
- Fields you need access to
Account
- Name
- BillingAddress
- ShippingAddress
- Phone
- Fax
- ParentId
Opportunity
- Name
- StageName
- LastModifiedById
User
- Name