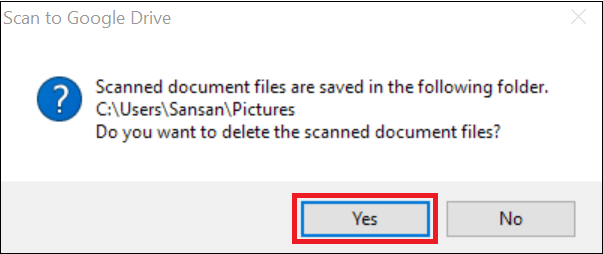
If after scanning, a dialog box comes up asking where to save not allowing you to finish scanning, you need to return the scanner to the correct the read-in settings and then rescan the cards.
Procedure
1. If after scanning, a dialog box comes up asking where to save not allowing you to finish scanning, Close the dialog box.
2. You will get a message saying "Would you like to delete the read-in file?". Tap "Yes", and close the window.
How to fix the scanner settings for reading in
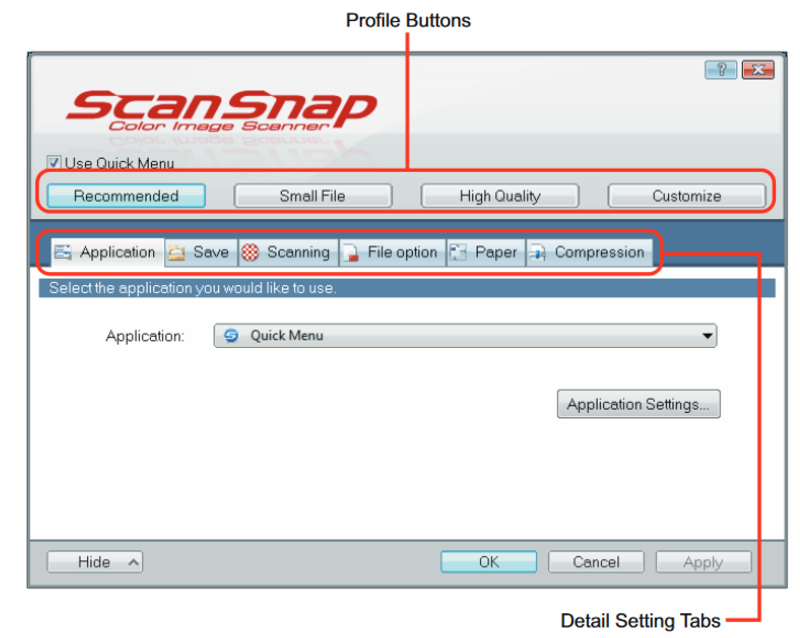
Please set the read-in settings for the Scanner as below.
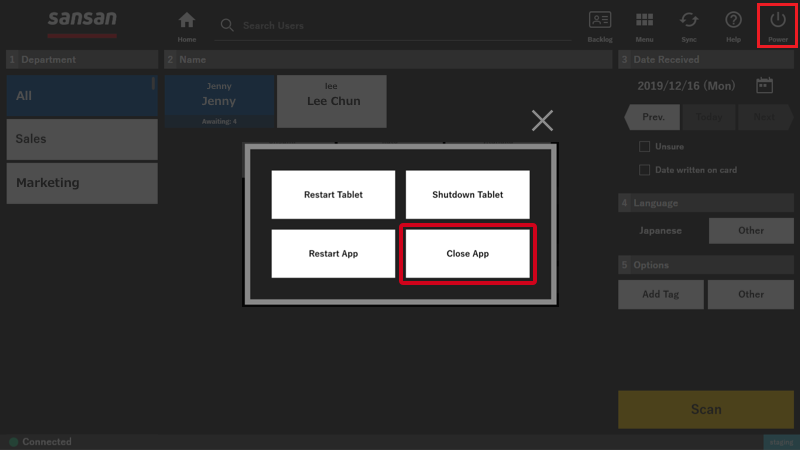
1. Exit the Application
1. If the Scanner App is open, please exit it. Tap the "Power" in the upper right of the screen", and then tap "Close App (Exit Application)".
2. Open "ScanSnap Manager Settings"
From the task bar in the lower right of the screen, hold down (right click) the S icon, and then tap "Scan Button Settings".
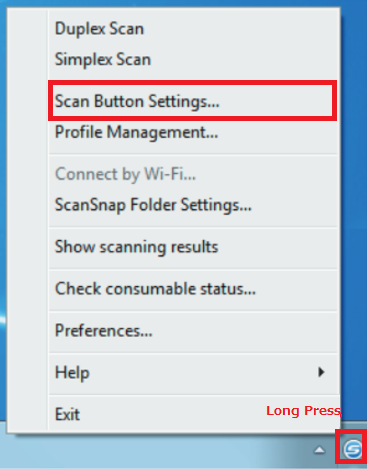
* If this icon is not displayed:
For Windows 8
From the application list, open up "ScanSnap Manager Settings" .
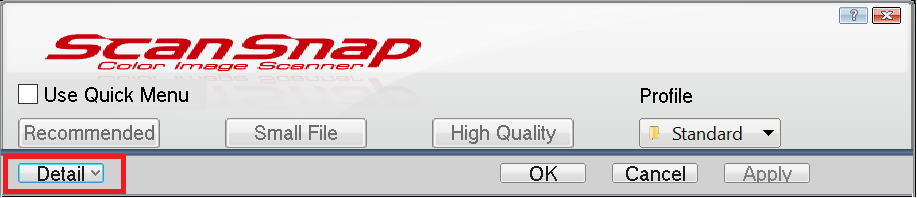
If the settings tab does not come up, tap on "Detail".
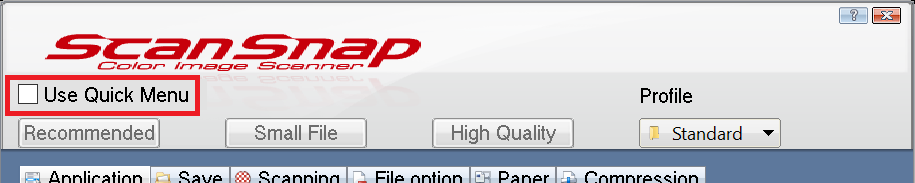
3. Removing the check from "Use Quick Menu".
If there is a check next to "Use Quick Menu", remove this check.
4. Set "Profile" to "Standard".
Check if "Profile" are set to "Standard".

5. Settings for "Application"
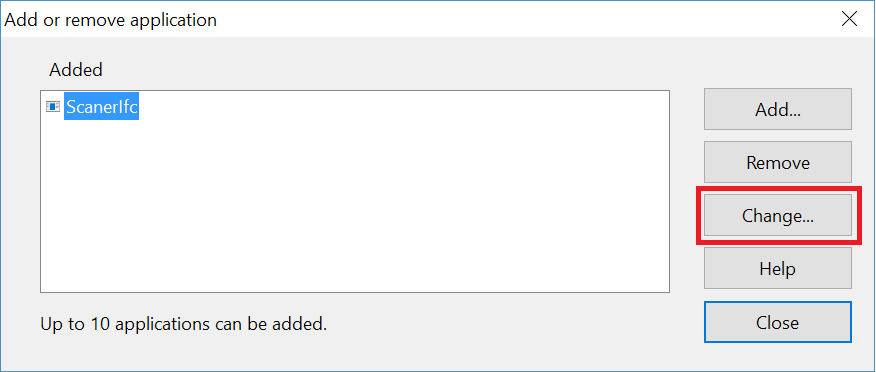
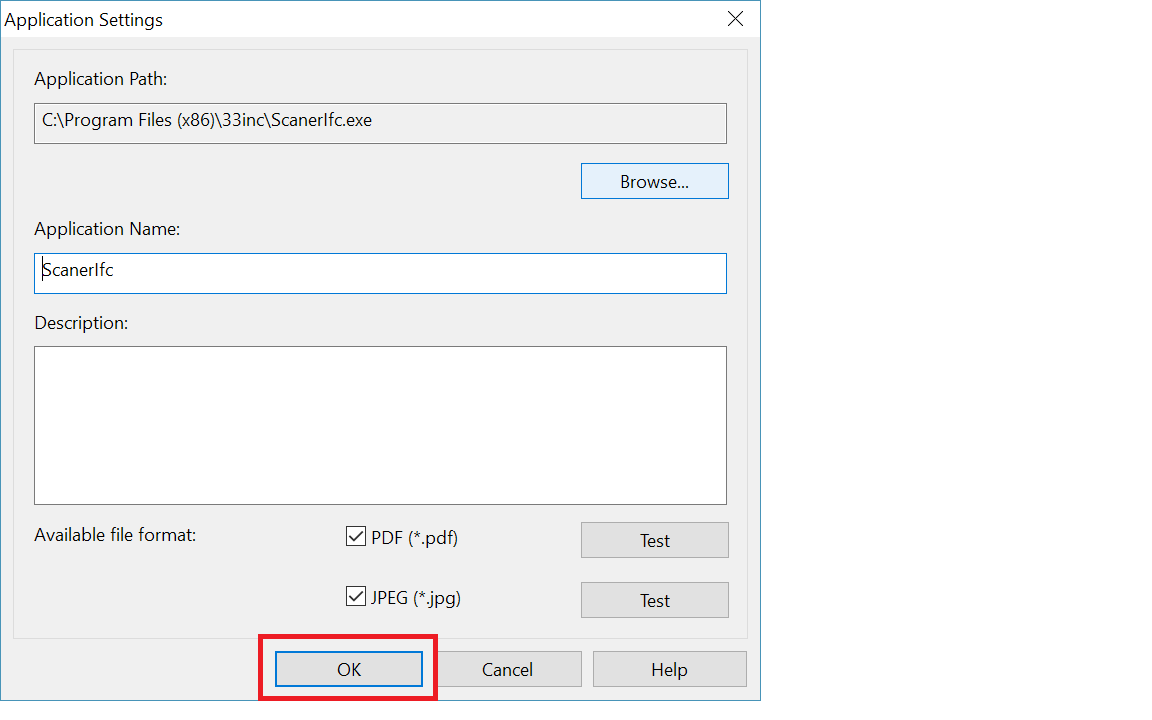
From the ScanSnap Manager settings screen, select the "Application" tab. From the selection, choose "ScanerIfc", and then tap "Application Settings".
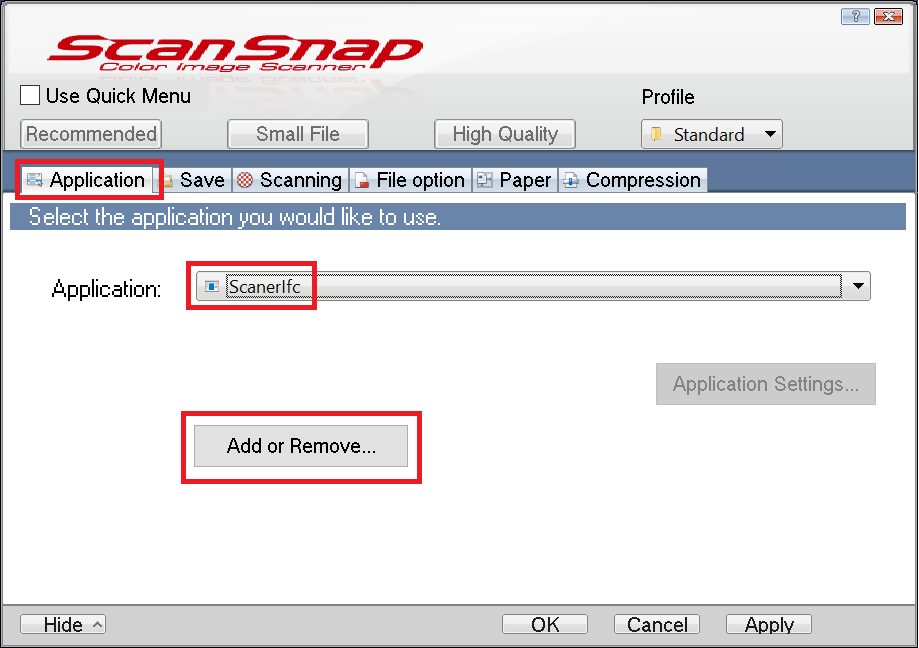
With "ScanerIfc" selected, tap "Change".
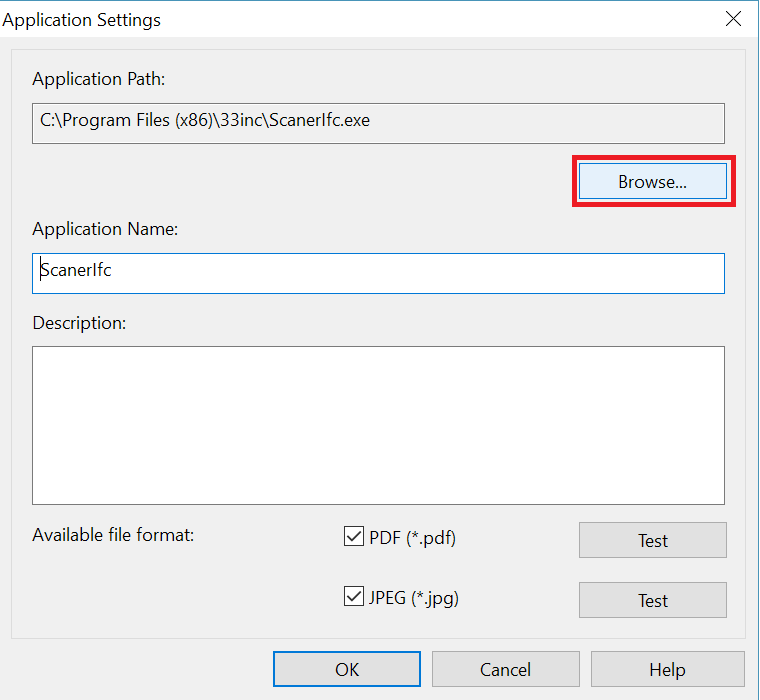
Tap on "Browse".
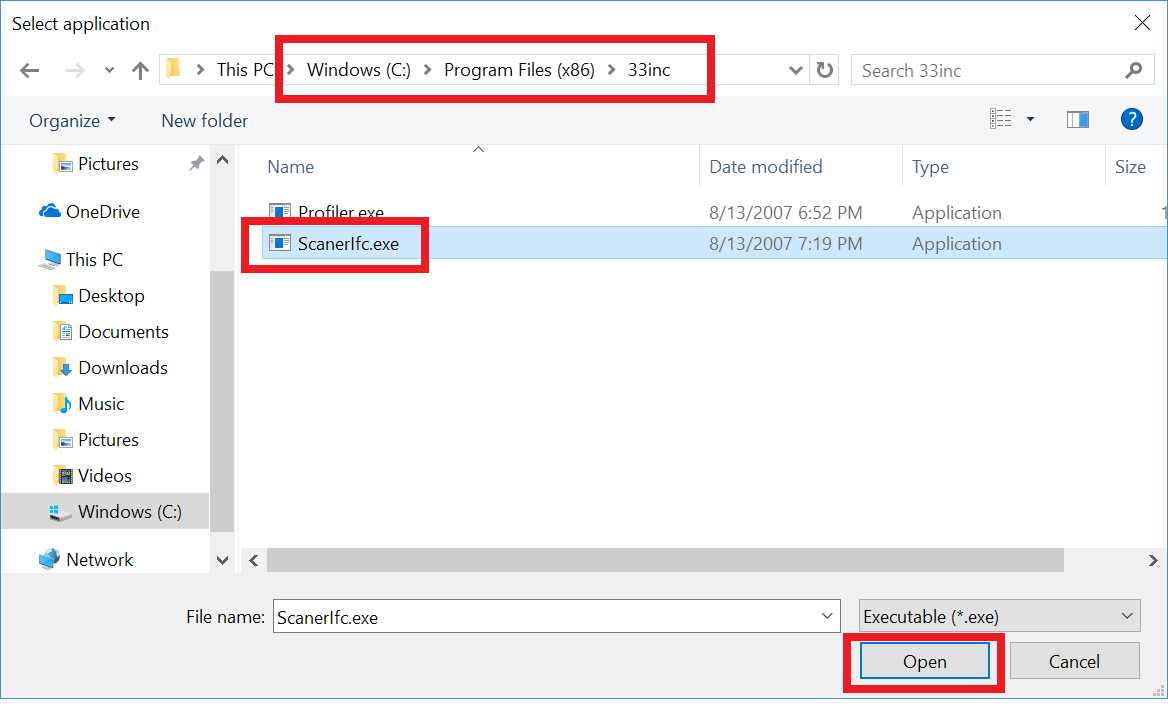
* Please note that for the 64 bit version and the 32 bit version, the application is in different places.
-For 64 bit version PCs
Select [C:\Program Files (x86)\33inc\ScanerIfc.exe], and then tap "Open".
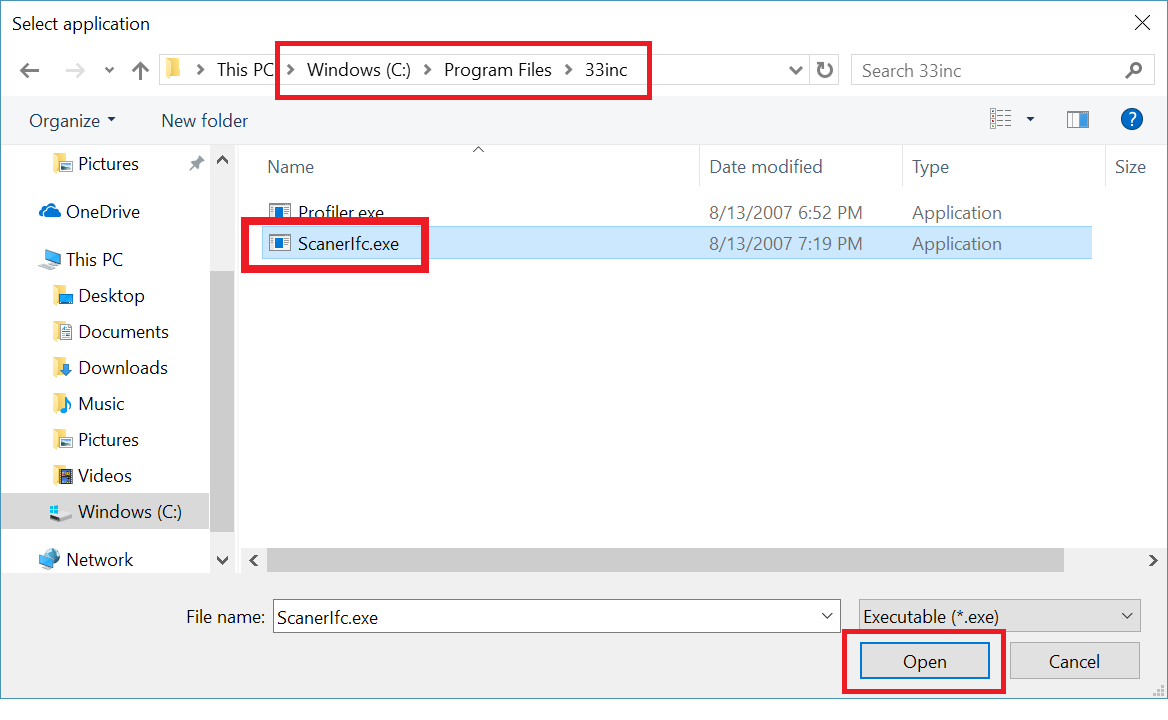
-For 32 bit version PCs
Select [C:\Program Files\33inc\ScanerIfc.exe], and then tap "Open".
Click "OK", and the "Application Settings" window will close.
Close the "Add or remove applications" screen.

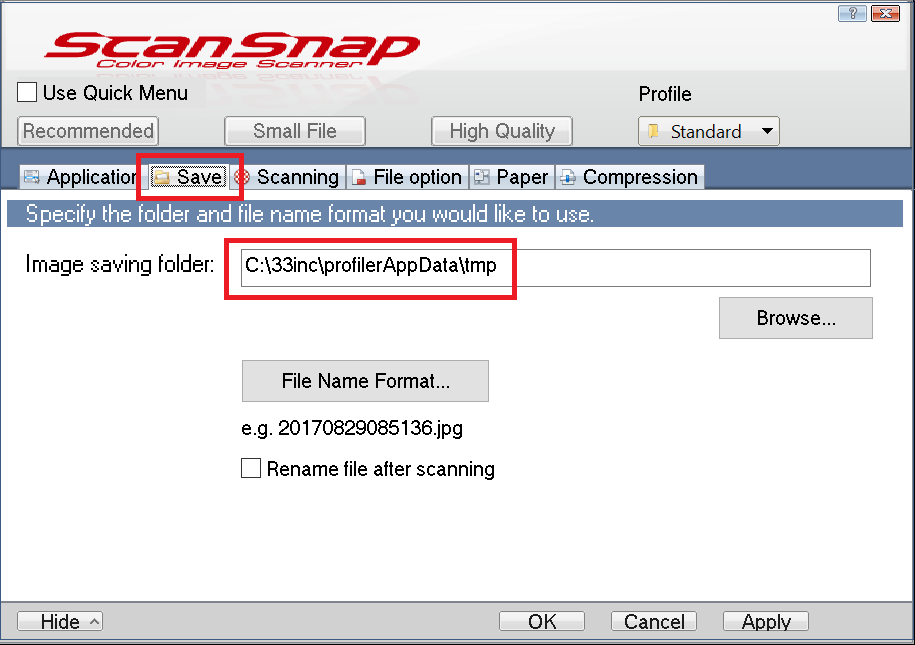
6. Settings for "Save"
Select the "Save" tab. For the image save folder, select [C:\33inc\profilerAppData\tmp].
7. Settings for "Scanning"
Select the "Scanning" tab. Do the following settings.
Image quality: "Super fine"
Color mode: "Color"
Scanning side: "Duplex Scan (Double-sided)"
Image rotation: "Automatic"
Blank page removal: No check
Continue scanning after last page: No check
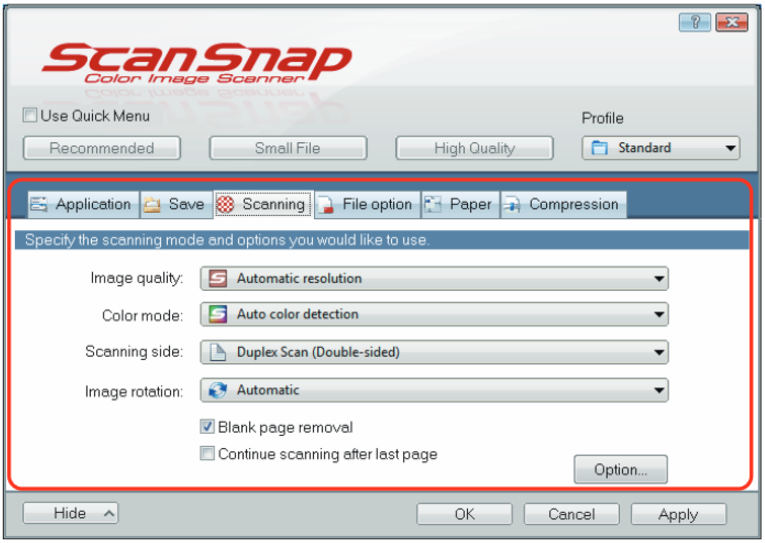
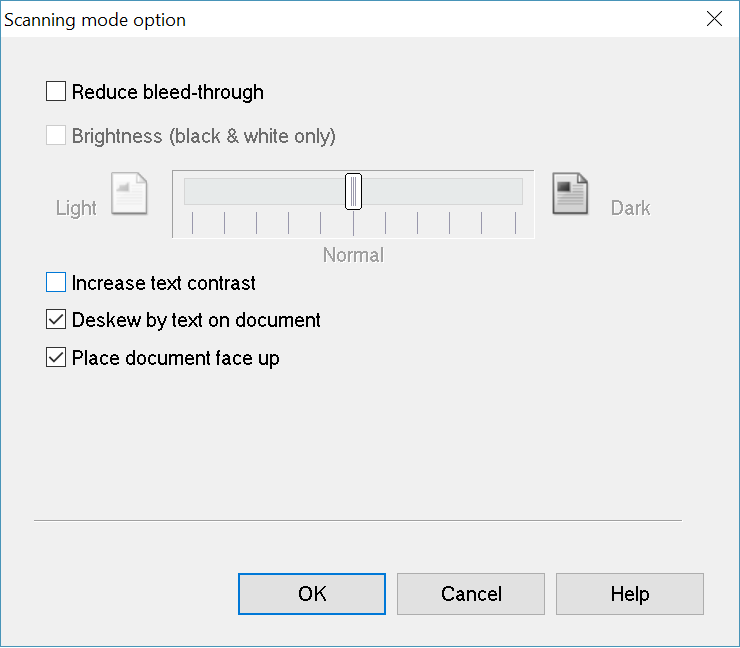
Next, from the "Scanning", tap on "Option". From the "Scanning mode option" screen, please do the following settings. When finished, tap "OK".
Reduce bleed-through: No check
Brightness(black & white only): No check
Increase text contrast: No check
Deskew by text on documentt: Check
Place document face up: Check
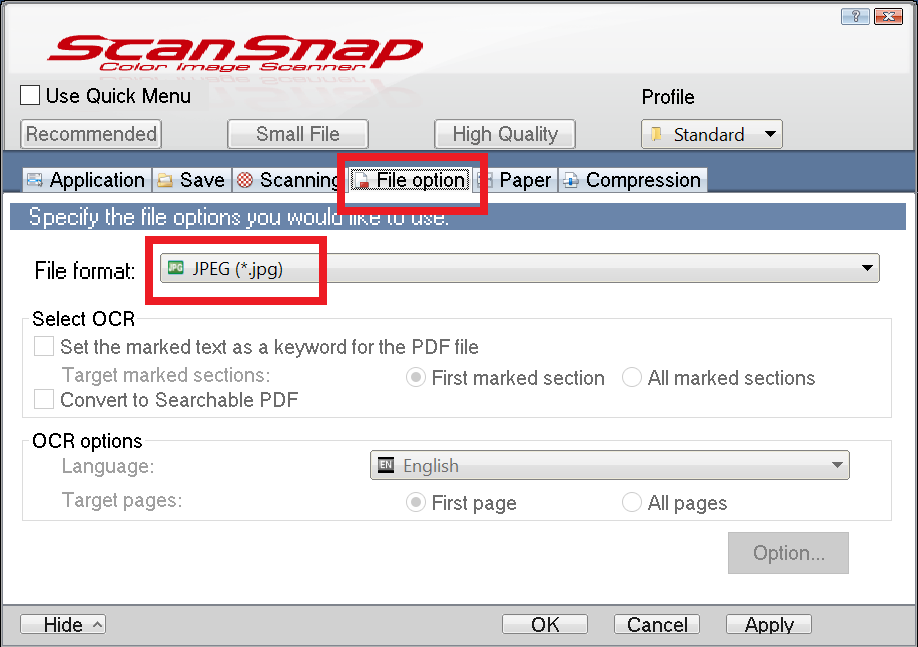
8. Settings for "File option"
Select the "File option" tab. Set it as below.
File format:[JPEG (*.jpg)]
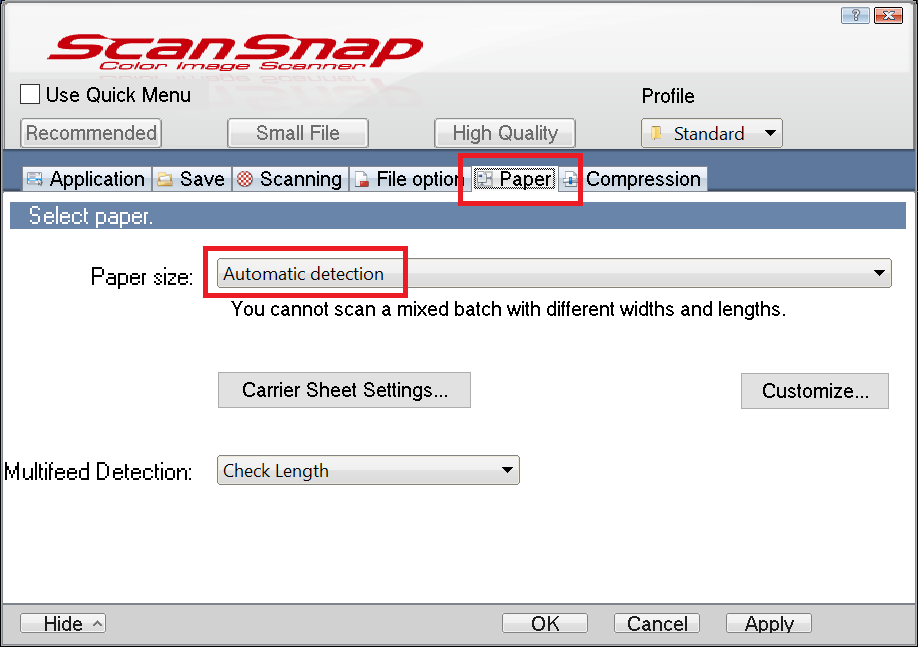
9. Settings for "Paper"
Select the "Paper" tab. Set it as below.
Paper size: "Automatic detection".
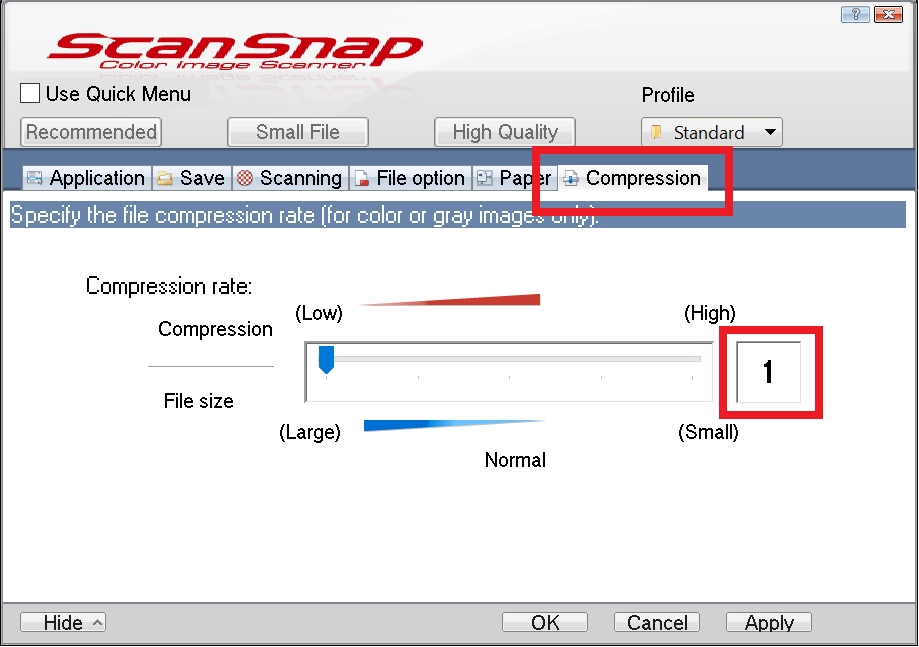
10. Settings for "Compression"
Select the "Compression" tab. Set it as below.
Compression rate: 1
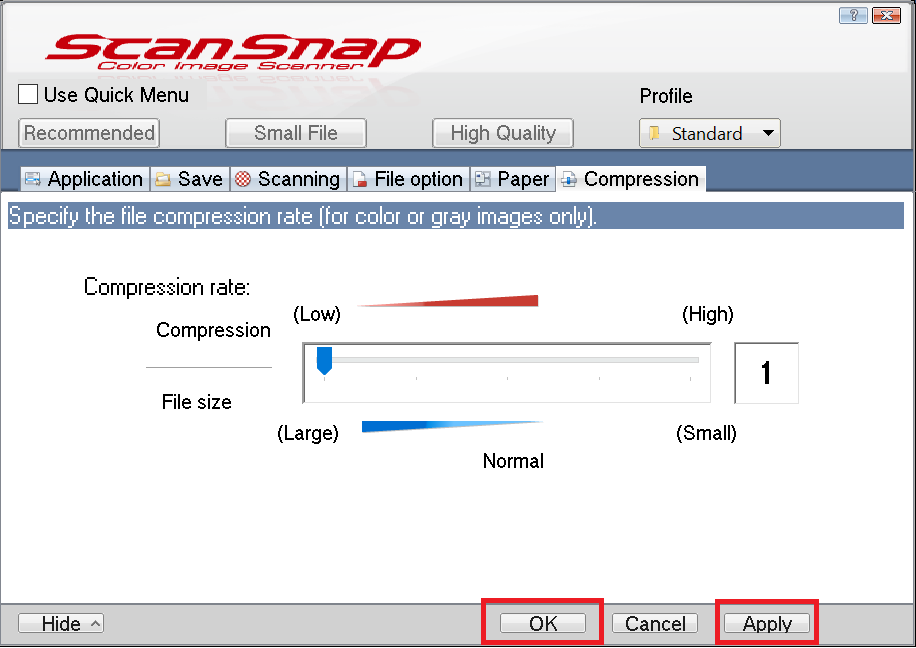
11. Settings for "Compression"
When the settings are complete, touch "Apply", and "OK".
With this, the settings for ScanSnap Manager are complete. Tap the Scanner App icon, and open up the Scanner App.
Scan the cards again, and check to see if the read-in is working correctly.
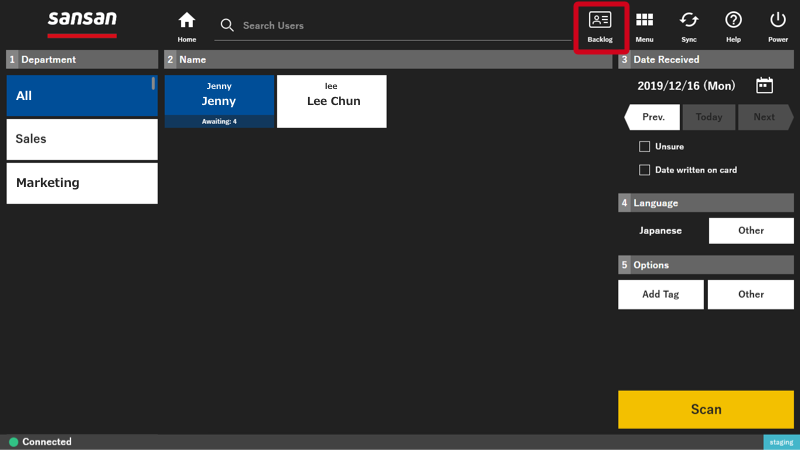
To the lower right of the user name, the number of cards will be displayed. From the upper right of the screen, if you tap "Backlog(Unsent)", you can check the number of cards scanned.